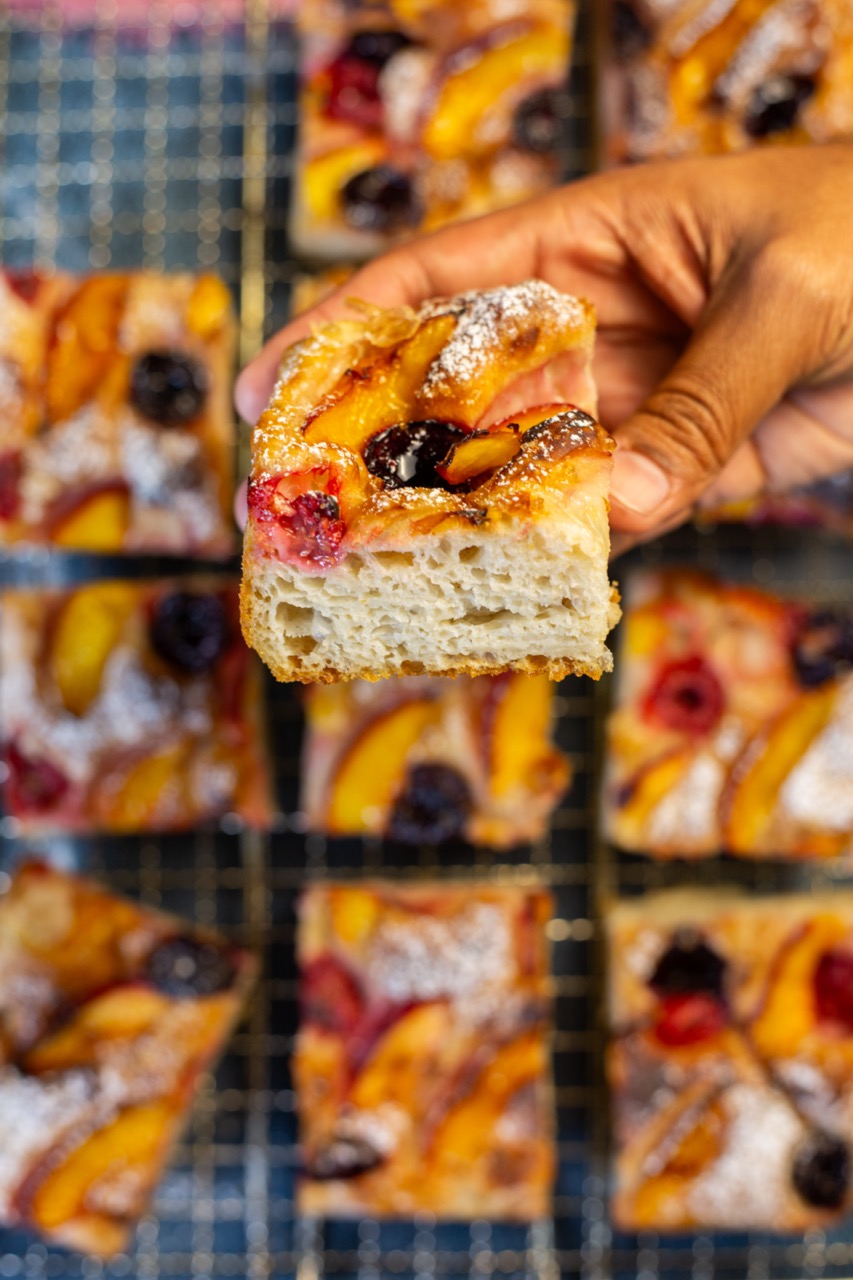
A fruity take on a delicious, crusty, crunchy chewy focaccia bathe in olive oil and bejeweled with fresh fruit

After the popularity of my savoury focaccia, I thought that a fruit version would be a nice alternative. I have seen a few variations on Instagram, went to the store and found cherries and nectarines and was inspired by that.
I think any stone fruit like plums, peaches and apricots would be equally delicious. You can pair them with raspberries, blackberries or even blueberries. I would avoid strawberries due to the high water content which may make the bread soggy.
For the bread itself, the technique is the same as my savoury version (If you want to see the stretch and folding methods, you can check out this reel on Instagram), save for the fact that I increased the sweetness in the bread and reduced the salt, to create a sweeter flavour profile. The stretching and folding requires a bit of patience, but thankfully no elbow grease or specialised equipment.
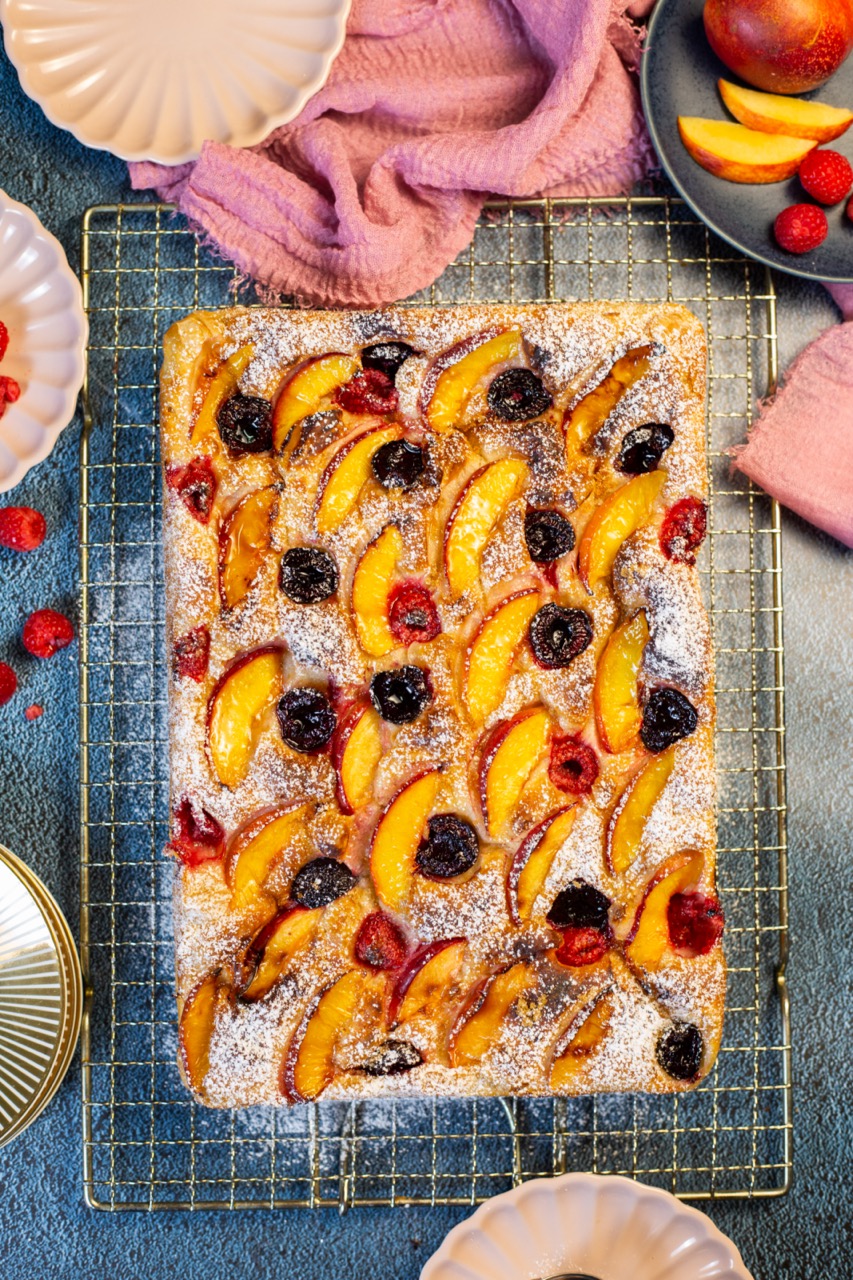
I love serving this as an accompaniment to a delicious afternoon tea, with a liberal dusting of icing sugar. It will however also be delicious as a dessert I think, served along side a scoop of ice cream or delicious creme anglaise.

If you make this recipe, please share it with me by tagging me on Instagram @adventureswithsugar or on Facebook at Adventures with Sugar.
FOR THE NECATRINE AND CHERRY FOCACCIA
- 250g “00” flour
- 300g white bread flour
- 8g instant yeast
- 1 1/2 teaspoons fine sea salt
- 1 tablespoon extra virgin olive oil
- 2 teaspoon honey (or maple syrup)
- 560ml body temperature water
* If you cannot find “00” flour, then simply use white bread flour. Reduce the water to 550ml, however.
- 90ml olive oil, for greasing and dimpling
- 1 – 2 yellow flesh nectarines, sliced into thin wedges with the skin on
- 150g cherries, stones removed and cut in half
- a handful of raspberries
- juice of half a lemon
- 2 tablespoons icing sugar
- 1 – 2 tablespoons demerara sugar for sprinkling
METHOD
- Begin by dissolving the yeast into the warm water (ensure that the water is not too warm or it could damage the yeast, or worse kill it).
- Then add in the honey, tablespoon of olive oil and salt. Mix to combine.
- Finally, add in both the flours and mix through. The dough will be quite wet, but that is normal.
- Cover the dough with a dish towel and let it rest for 30 minutes.
- The perform the first series of stretch and folds. To do this, wet your hand and tuck it under the dough and grab one of the four “corners”. Simply tug it up and then fold the dough over itself, ending at the opposite end. Repeat this step four times in total, on each of the corners.
- Wait 30 minutes, and then do the stretch and folds for a second time. Then, waiting 30 minutes again and do one final set of stretch and folds.
- After the final stretch and fold is done, let it rest for thirty minutes and do a coil fold. To do this, simply wet both hands and grab onto each corner of the dough. Gently lift it up, pulling it slightly like the stretch and folds. Tuck the ends of the dough underneath to form a boule, then repeat the process on the other two ends.
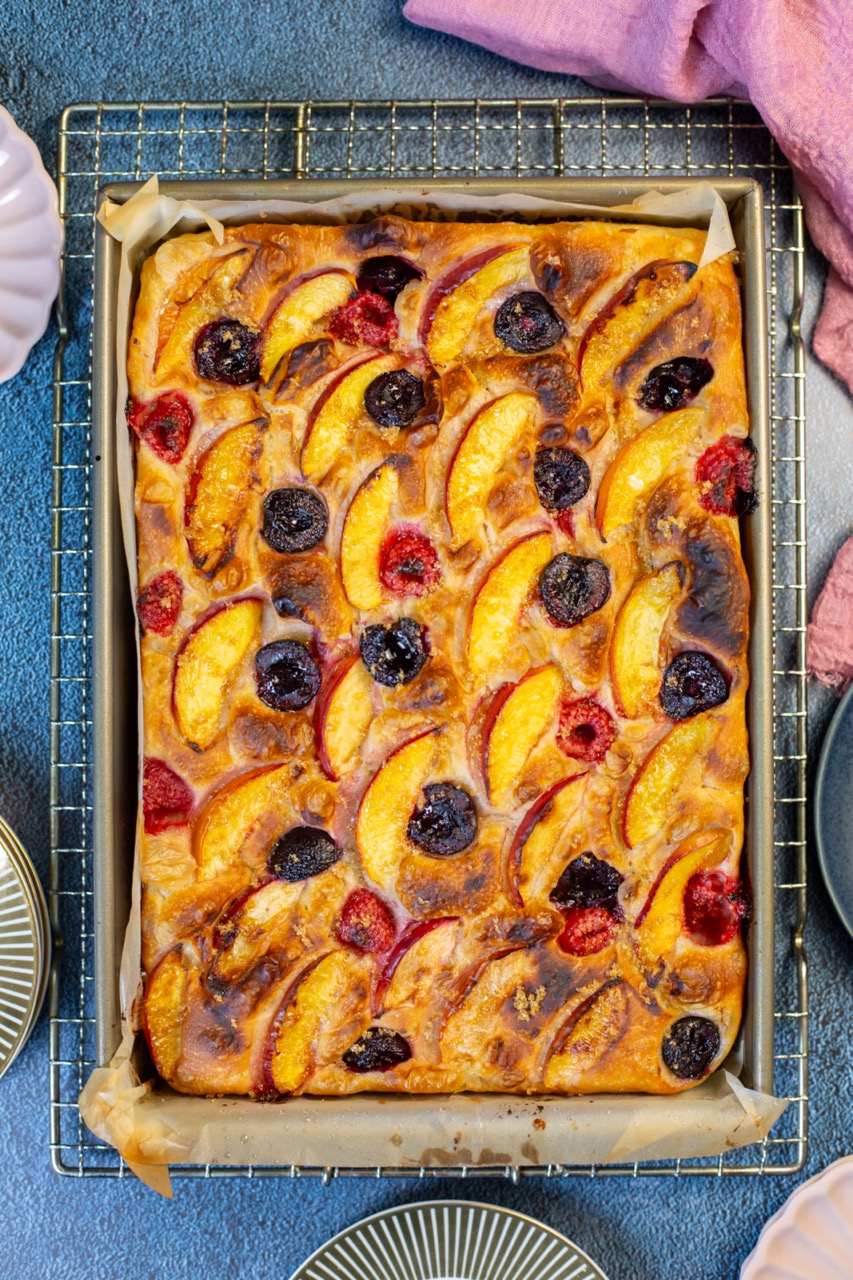
- Prepare a 22cm by 33cm rectangular tin, with high sides, by lining the base and sides (it is important to oil the sides) with baking paper.
- Once lined, drizzle 50ml olive oil on the lined base and spread it out over the entire tray.
- Tip the dough into the tin and do a book fold. To do this, take 1/3 of the breadth of the dough and fold it 2/3rds of the way onto itself. Then take the other breadth of the dough and fold it over the first fold, like a book. Finally flip the dough over so the seam side is down.
- Drizzle some olive oil onto the dough and rub all over, then cover the tin with another tray and set aside to proof for about an hour to an hour and a half.
- When ready to bake, place the rack in the lower shelf of the oven. Place an extra baking tray upside down to prevent-heat with the oven – this will help crisp the base. Then pre-heat the oven to 230 degrees celcius.
- Meanwhile, stretch the dough to the sides of the tin, if it has not reached there already. The dough should be nice and jiggly. Drizzle over the remaining olive oil, and then dimple the dough by submerging your oiled fingertips into the dough. Little bubbles will begin to form.
- Prepare the fruit by ensuring that the cherries are pitted and cut in half and the nectarines are sliced into thin wedges. Squeeze in the juice of about half a lemon and add a tablespoon of icing sugar to the mix and toss to thoroughly combine. Taste the level of sweetness/tartness and adjust to your taste.
- Place the fruit all over the focaccia, gently nudging it into the nooks of the dimples and pressing gently into the dough. Add in the handful of raspberries for extra pops of colour. There may be some liquid left over from the fruit, but that must be discarded as adding it to the dough makes it soggy and wet.
- Place the tray with the focaccia in the oven on top of the pre-heated, upside-down baking tray and bake for 20 minutes, initially. Then add the demarara sugar and bake for another 10 – 15 minutes. Keep an eye on the focaccia every 5 minutes to ensure the sugar and or fruit does not burn. If the top is getting too brown, cover it with foil and continue to bake.
- Once done, remove from the tin and place on a cooling rack to cool for 30 minutes, before cutting and enjoying. Whilst I enjoy a savoury focaccia still warm, I do think that this fruit version is better served once it has completely cooled.
- I like serving this with a generous dusting of icing sugar, but a thin custard poured on will be equally delicious.
Recipe by adventureswithsugar.com


No Comments